If you’ve been following me for a while, you know I love a good ceiling treatment. Back in 2020 I updated Isla’s ceiling with a rainbow feature. Check out that DIY here!
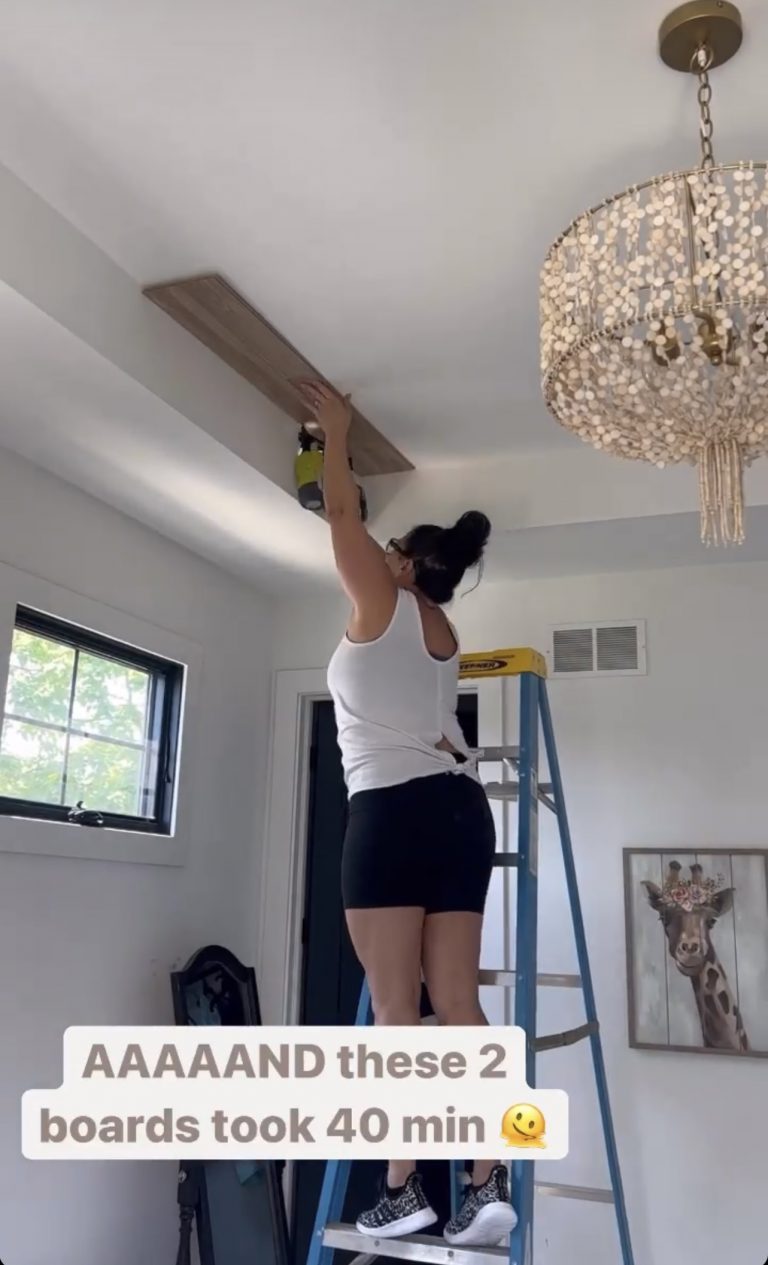
Forewarning: it is always a literal pain in the neck and shoulders to do any work on the ceiling but I think it’s always worth it! Read my DIY Laminate Planked Ceiling tutorial below!
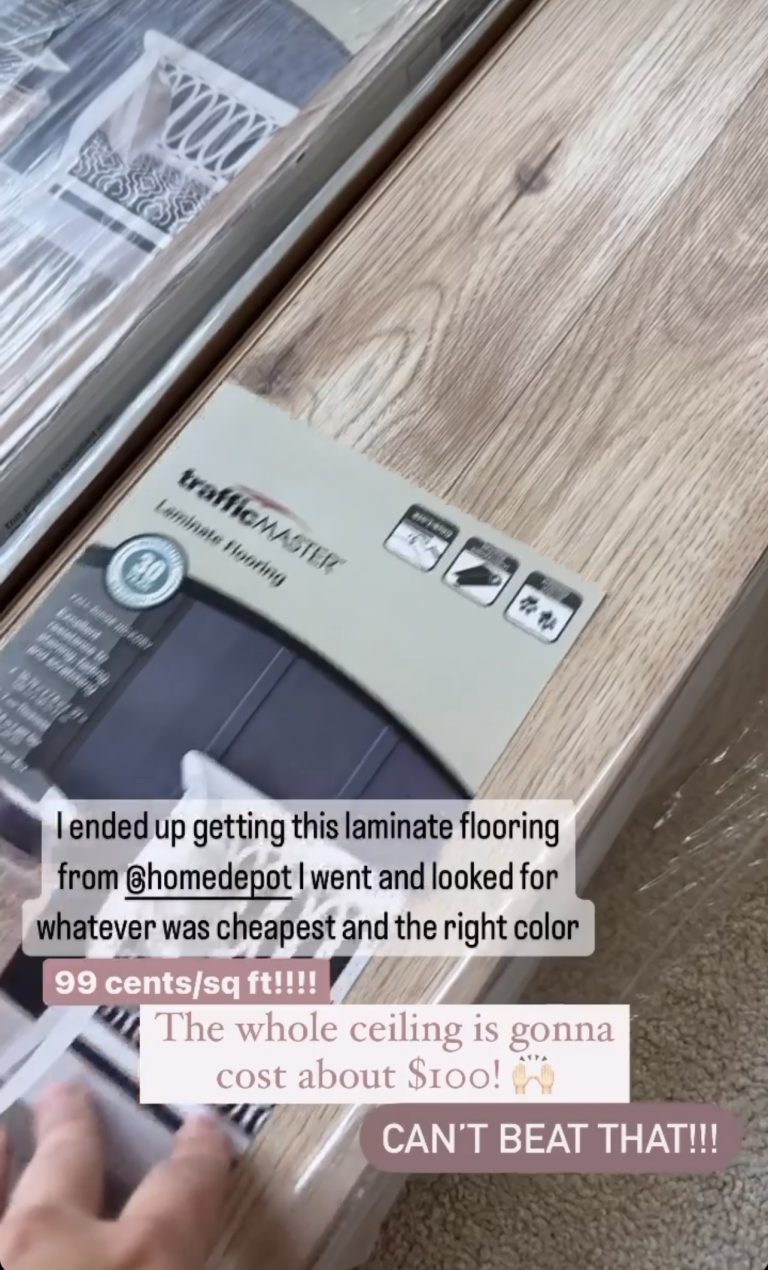
I headed to Home Depot and just looked for the cheapest option laminate flooring that was in the color I liked. I ended up finding this option which was 99 cents per square feet. So I was able to do her entire ceiling for $100!
I attempted to put the first two boards up on my ladder but quickly realized that was going to be difficult. I had a hard time getting the pieces up because you have to click in the tongue and groove length and width-wise by tapping the ends of the laminate to create that seamless line between the two boards and then nail it in by myself. So after realizing that wasn’t working, I pulled out my scaffolding to stand on as it would help hold all the tools I would need to get the pieces in place.
At the end of the rows, you’ll need to cut the piece to fit the space remaining. Some options allow you to measure and score with a blade to then snap off the excess. Unfortunately, with the laminate I bought that wasn’t an option so I needed to cut it with my miter saw. If you’re recreating this project just make sure to think through that in case you don’t have access to a miter saw.
In order to measure the space for the last board, I flip over the board for the bottom (which will be against the ceiling once nailed up) is showing and I just mark where the next board hits it to cut.
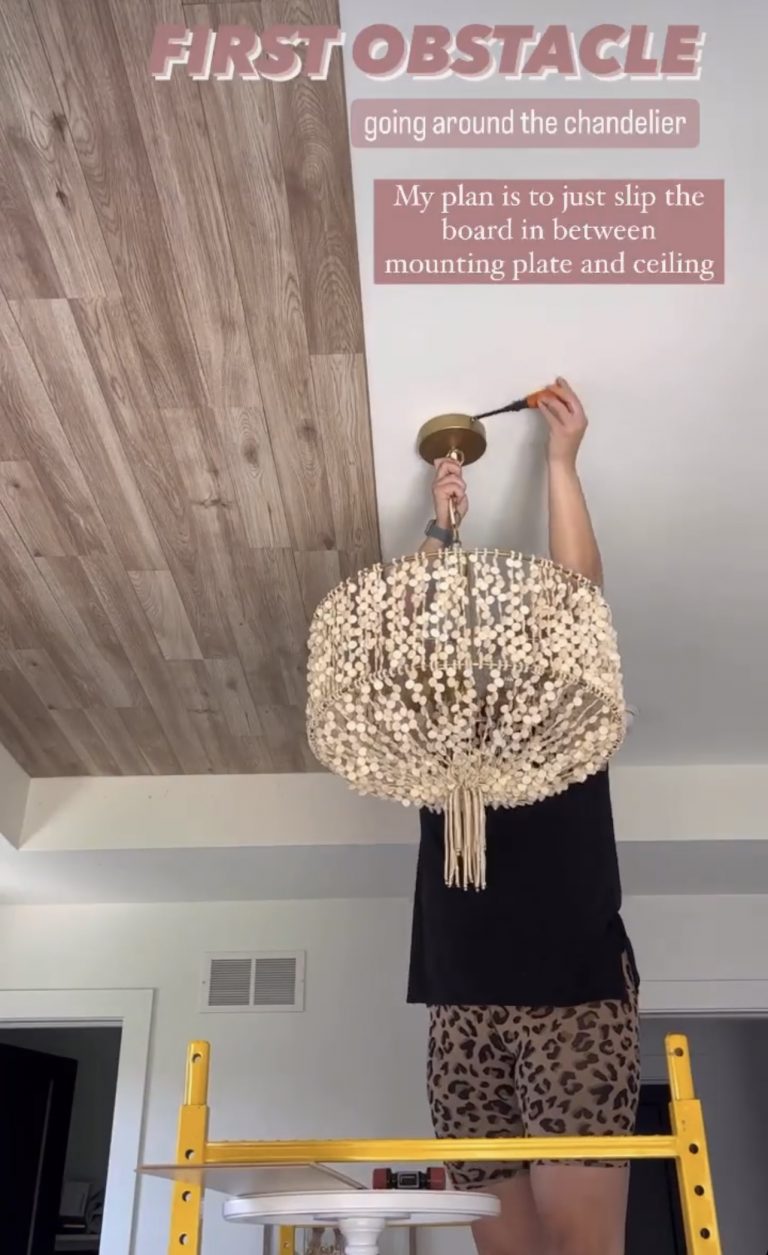
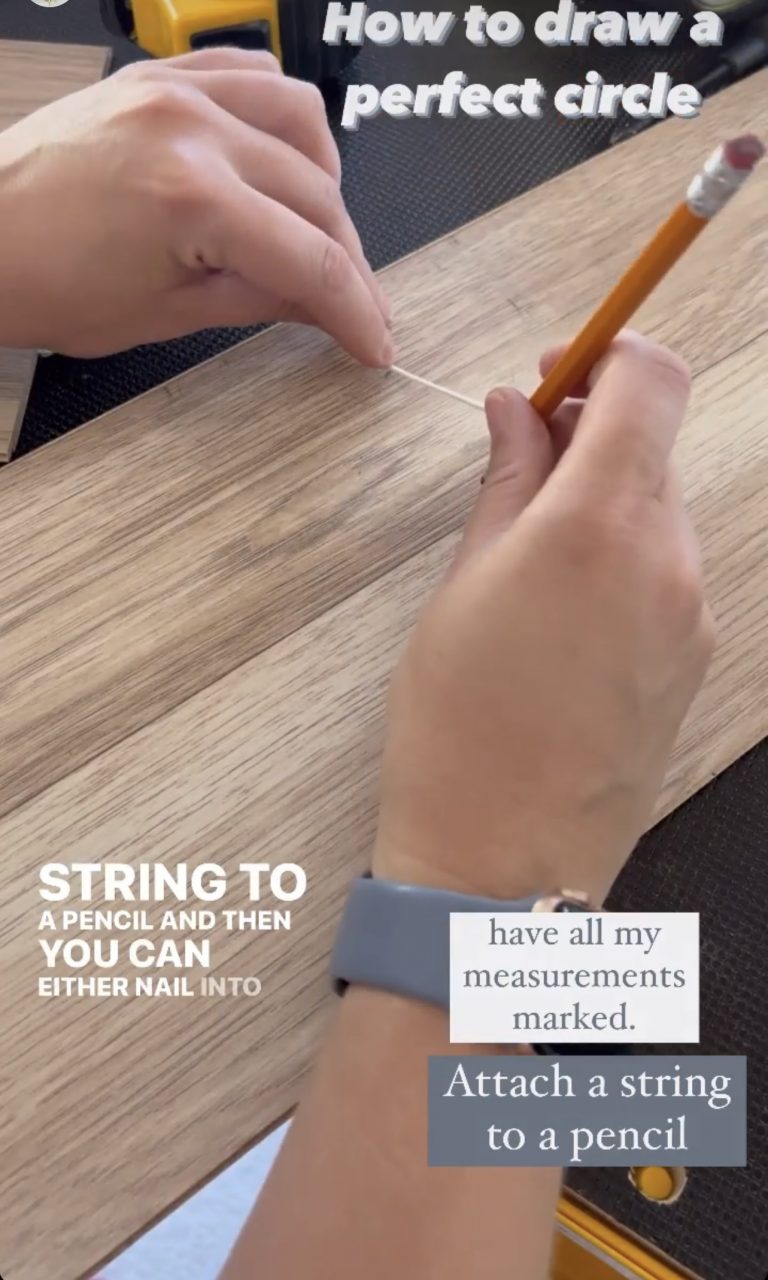
It took me a couple of rows but I started to feel like I was getting the hang of it. When I got to the middle of the room, I needed to measure out the opening for the light fixture. To do this I unscrewed the fixture to see where the plank would have to cover. I plan to put the plank up and screw the light fixture back on top. I held the plank up to measure out where the hole would be. I then used a pencil on string to create the circle to be cut out.
Did you know to draw a perfect circle you just need to attach a string to a pencil!? You make the string the length of half of the circle that you want. You then can nail down the end of the string not attached to the pencil at the center point of your desired circle. For this project, my circle was so small that I could just hold the center point instead of nailing. Just make sure to hold the pencil up straight with the string taught and then you can pull it around to make the perfect circle. I then used this jigsaw to cut out my partial circle piece.
And now that I’m halfway through my project, I decide it’s so complicated getting the tongue and groove to click in both length-wise and width-wise…. So I ended up cutting off the tongue and groove pieces for the remaining rows.
And for my final row I needed to rip the boards down because they were wider than the space left for the last row. My favorite tool for these projects is my push block. It’s so much safer than using a spare wood piece and makes me feel much more comfortable!
Now that all of the planks are up I just need to fill in my nail holes and then trim. I wanted to trim because it just adds an extra finishing touch but also, it covers the cuts that aren’t super precious on the ends.
I used oak trim for the perimeter of the ceiling. I decided to sand it down to make the color match the planks better.
For the corners where two pieces meet, I made mitered corners. You can do this by cutting both mitered and beveled cuts on the trim. Mitered gives you a nice 90 degree angle with 2 45’s. I turn my saw to a 45 degree angle and then cut. A bevel cut is when your saw is at 0 degrees, except this time you’re going to turn your saw to a 45 degree angle, meaning you’re cutting into the depth of the wood.
And because the length of trim needed is so long, one piece of trim isn’t long enough. So I beveled the trims to allow the two straight pieces of trim to meet with a 45 degree angle cut into the depth of the trim. When two bevels are lined up their seam almost completely disappears.
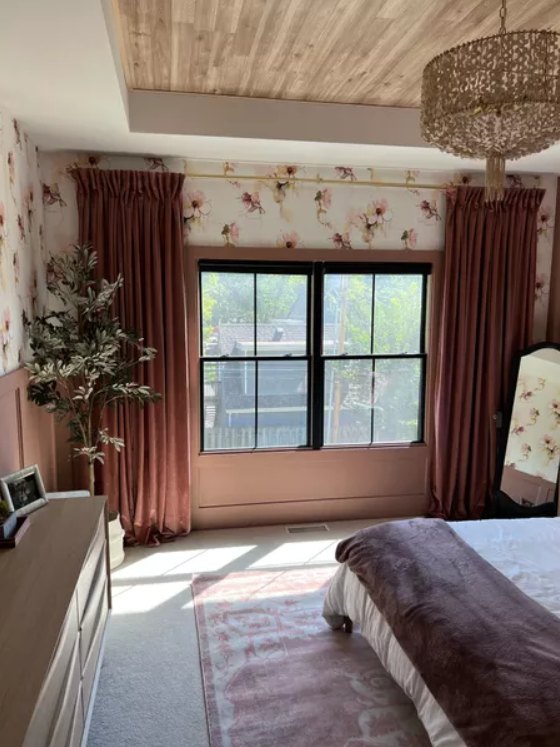
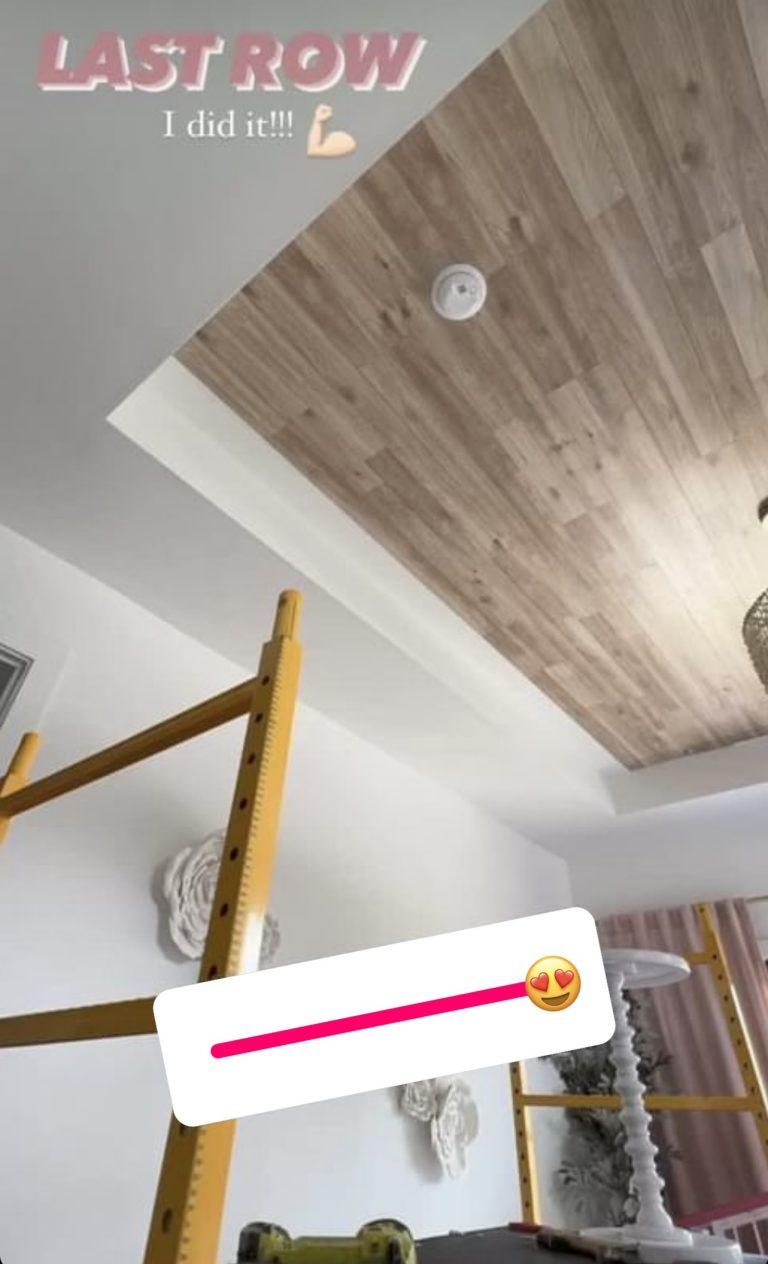
Here it is! This project absolutely transformed my daughter’s room. The tone of the wood adds a nice warmth to the space. I linked all of the products that I used here! Be sure to follow me on LTK and Amazon to access all of my favorite DIY supplies.