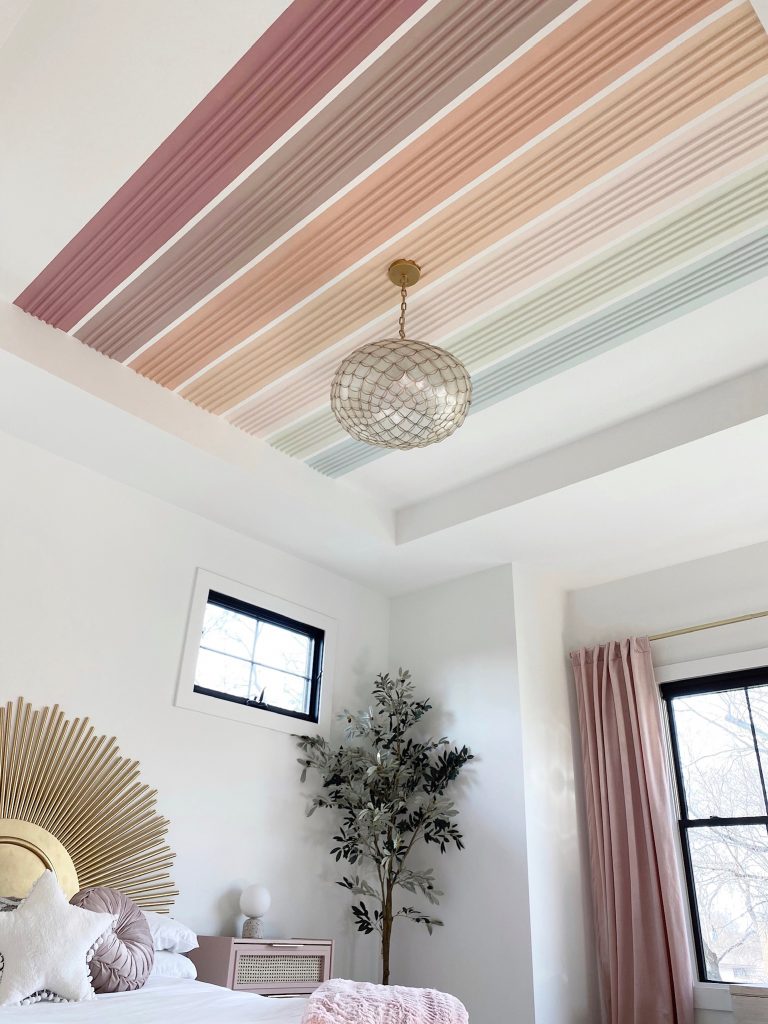
Here is the muted rainbow ceiling treatment that I did in my daughter’s bedroom last year. I wanted to add sunshine and happiness to a boring, white ceiling! Want to learn how to DIY a Rainbow Ceiling? Read below!
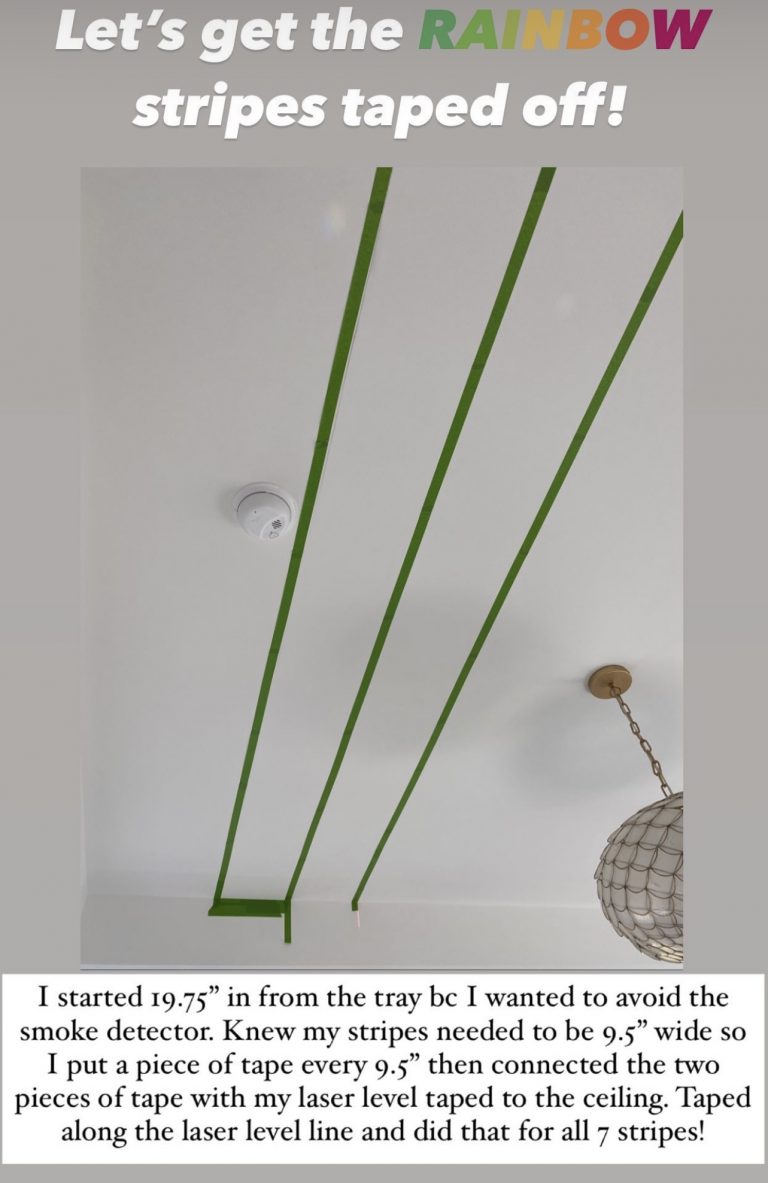
I planned to first paint the ceiling and then would add half round trim for some fun dimension. When taping off where the rainbow paint stripes will go on the ceiling, I started 19.75″ in from the tray simply because I wanted to avoid the smoke detector. I knew each rainbow color stripe needed to be 9.5″ wide so I put a piece of tape every 9.5″ then connected the two pieces of tape with my laser level taped to the ceiling. I taped along the laser level line and did that for all 7 stripes.
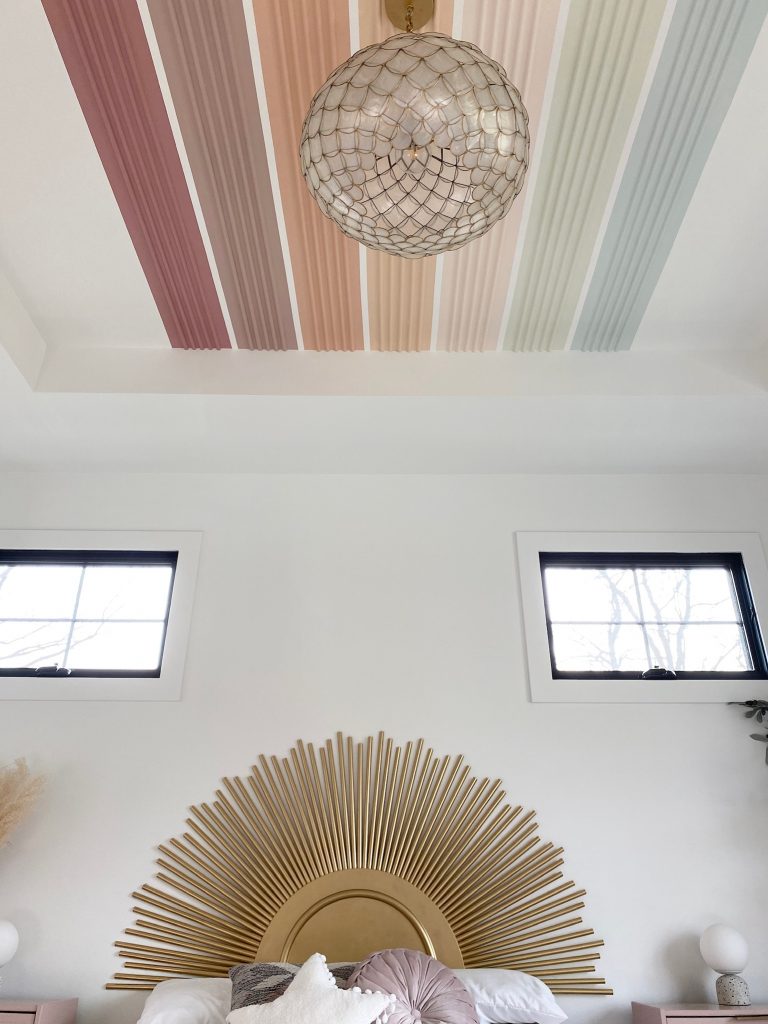
The first stripe is Pressed Flower by Sherwin Williams, which is the same color as the dresser.
The second stripe is Rose Brisque by BM, which is the same color as the IKEA cane
nightstands.
The third stripe is Warming Peach by Sherwin Williams.
Than Sweet Orange by Sherwin Williams.
The fifth stripe is Nearly Peach by Sherwin Williams.
The sixth stripe is Sagey by Sherwins.
And the final stripe of the rainbow is the perfect baby blue color, Window Pane by Sherwin Williams.
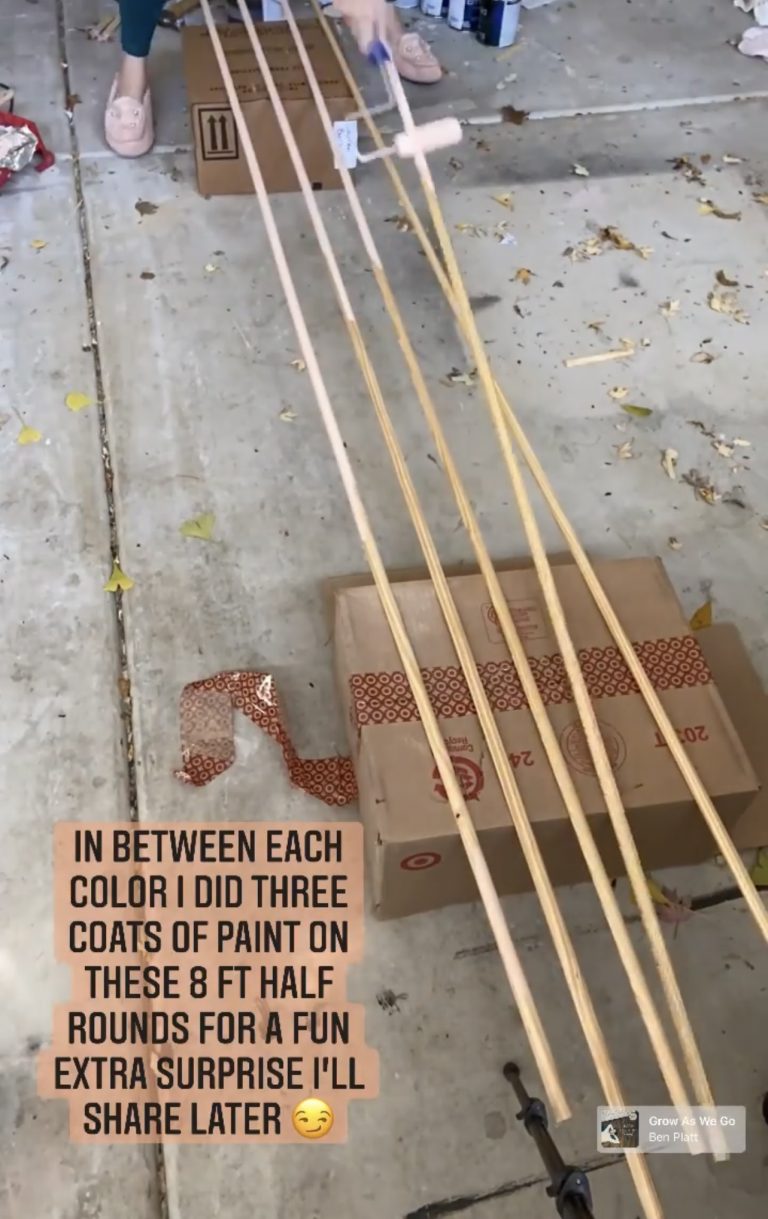
I also painted four half round trims per each color to be added lengthwise on top of the painted stripe for fun dimension. I did three coats on each piece of trim.
Then the final step was to caulk, fill nail holes and touch up the paint!
Ta-da! Here is the final result. My daughter loves it so much! This DIY is pretty easy and straight forward. I love the detail of the half rounds, it draws the eye upwards and creates visual interest. This DIY is truly the perfect ceiling treatment for your little girl! <3
Thanks for reading! Check back for weekly blog posts and to stay up to date with current DIY projects!